Technology

[How-to] Switch To US PlayStore Permanently

Android developers might release a lot of applications for the mobile operating system but when it comes to availability they restrict themselves to US region only. You might have observed some of the applications do not show up in search results and when you purposely hunt them on Google and the links redirect back to the play store which end up showing the error message “This item is not available in your country”. This is annoying because even Google knows that this won’t stop us from installing the application Android can’t be much restricted but still they do such things. US region being the hub for all such services has a lot more to offer its residents than only other country in the world. Therefore we bring this guide for users who wish to exploit some of these opportunities.
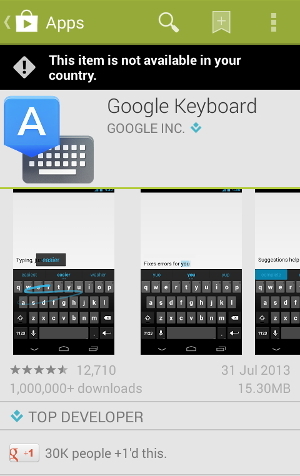
Not available in country error

  1. Install HideMan application from your Google Play Store.
  2. After installing the application, select United States.
  3. Uninstall Google Play Store updates and Play Services updates from the Application Manager.
  4. After uninstalling the updates, launch HideMan and start VPN by selecting US region.
  5. Launch Play Store and wait till it detects the internet connection and then your US Play Store will be ready.
  6. Now you can stop VPN by terminating HideMan application because Play Store has downloaded the region specific files and has changed your region to US.
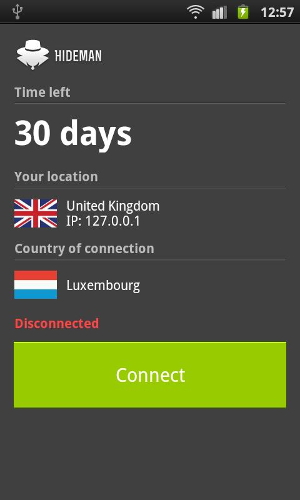
hideman

Now you can download any US region specific application directly from the Play Store without any issues and enjoy the features which earlier you could not.

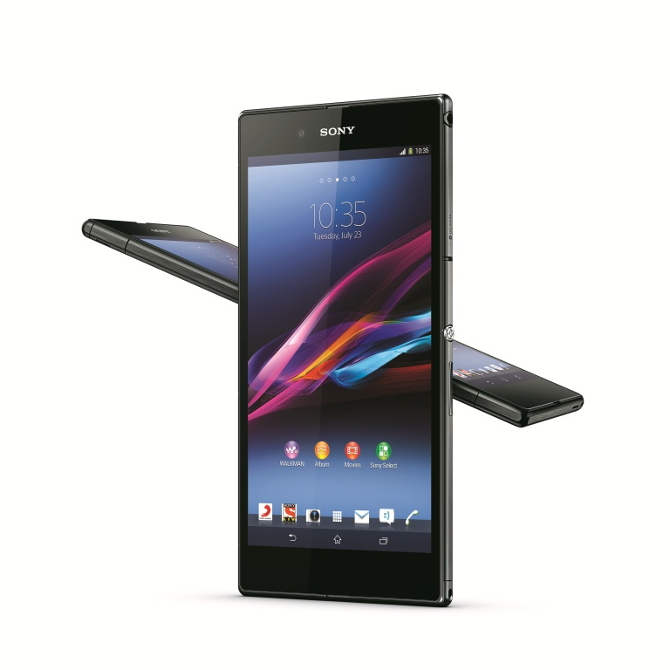
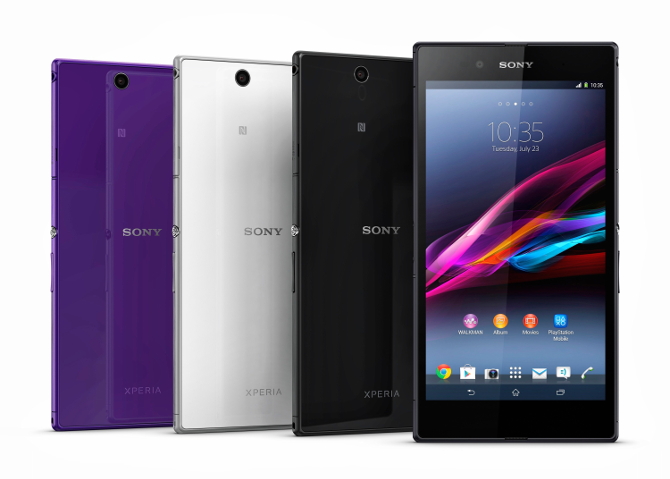
Sony Launches Xperia Z Ultra Smartphone in India for Rs. 46,990

Sony India today on 30 July 2013 announced the amazing Xperia Z Ultra in India which packs a lot of unique features. Counting on the new features Xperia Ultra Z is the world’s slimmest smartphone to be launched till now. Secondly it is the first device to launch with Snapdragon 800 in India and third it has 6.4inch full HD triluminos display powered by the Sony’s latest X-Reality for mobile picture engine to deliver the most immersive viewing angles. And last it is the first phablet to be waterproof which sums up for its uniqueness and makes it different from others.

Xperia Z Ultra

Features:

  • 6.4 inch Full HD display powered by Sony Bravia Engine
  • 2.2 GHz Snapdragon 800 processor
  • 2GB RAM
  • 16GB internal memory expandable via microSD card slot
  • 8MP camera rear camera and 2MP front-facing camera
  • WiFi/Bluetooth/3G/NFC
  • Android 4.2
  • 3050mAh battery

Xperia Z Ultra

Pricing and availability:

Sony has tied-up with Vodafone to offer 8 GB free data download for the first two months of product purchase. The Xperia™ Z Ultra will be available across all Sony Centers and major electronic stores across India by 2nd August 2013 for Rs. 46,990. The Xperia Z Ultra will be available in Black, White and Purple color options. The Xperia Z Ultra also comes with three optional accessories which are the SBH52 which is dynamic Smart Bluetooth Handset, the Magnetic Charging Dock DK30 and the smart cover for the phablet.

[How-to] Share files using FTP on Android

Android is the most versatile mobile operating system. It has loads of functionality which other mobile operating system restricts. FTP which is the acronym for file transfer protocol is the popular way to exchange data between two machines. Web hosting generally use this or HTTP for file transfer. Android being a complete mobile os supports this protocol as well but needs a client to unleash its productivity. Matching the needs we found a suitable app for this purpose called as ES File Explorer.

ES File Manager

The application itself is a complete package which completely manages files and additionally has support for FTP, LAN and cloud storage as well. We shall for now focus on how to share files via FTP. Below is the step-by-step guide on how to make your Android device as a FTP client and use a different machine to extract files from it.

  • Download ES File Manager application from Google Play Store.
  • Tap the globe icon on the top left corner.
  • You shall see a dropdown menu, expand network and select FTP.
  • Make sure you are connected on a WiFi network.
  • Tap on ‘Turn on’ button.
  • Your FTP server is now ready.
  • On your computer or any other device use the IP address as shown on the screen with the port number after ‘:’ on any FTP client like FileZilla.
  • You can also type the address exactly in any browser or file manager on your machine to access the files directly.

ES File Manager

FTP gives you the access to exchange data that is you can add and delete files from the Android device easily that too wireless. Therefore this can be an alternative for users using OS X or linux which don’t have MTP support.

PayPal Increases the Transaction Limit to $10,000 For Indian Merchants

PayPal has got some good news for Indian merchants using the service. PayPal merchants in India can now receive up to $10,000 per transaction for export-related payments for goods and services, effective immediately.

paypal

Earlier where the limit was $500 per transaction in September 2011 which further increased to $3000 within a month has now reached $10,000 today on July 29 2013. All this have been possible after RBI agreed to increase the transaction limit for online payment gateway service providers.

Merchants can accept credit and debit card payments through their website, mobile, eBay listing, or simply by sending an invoice. This will effectively result in increase global presence by selling the products to over to 132 million active PayPal users in 193 markets around the world and accepting payments in up to 25 currencies.

In order to receive export-related payments, merchants must confirm their email address, and add a Permanent Account Number (PAN), Purpose Code and local bank account to their PayPal Account. This not only protects them from blaming fraud but gives a protection managing risks to keep their business secure and minimizing losses.

It has also been reported that PayPal has got the license for domestic payments in India and we might see rupee exchange soon within the country.

Asus Upgraded Variant of FonePad Now Goes Online For Rs. 17,999

Few months back Asus launched the FonePad tablet in India for 15,999 with Intel Atom Z2420 1.2 GHz processor with 1GB RAM and 8GB internal memory which can be expanded further via microSD card up to 32GB as its technical specifications. Recently Asus refreshed this FonePad for markets like India with better specs and more memory which appeared online on e-commerce websites for Rs. 17,999.

Asus FonePad

This refreshed variant includes a 7-inch LED display offering 1280×800 pixels resolution same as that on the original model but they have upgraded the chipset from 1.2GHz Intel Atom Z2420 to the 1.6GHz Intel Atom Z2460 which has the same PowerVR SGX540 GPU and 1GB of RAM. It also comes with voice-calling support on 2G and 3G cellular network. On the software front, the tablet runs on the Android 4.1 Jelly Bean out of the box but can be upgraded to version 4.2 later when the update is available. Apart from this one major change is in the internal memory which was 8GB earlier and now has been boosted to 32GB. So users can install a 32GB microSD card slot and get up to 64GB storage on this tablet. Other features remain the same including 3-megapixel rear camera, 1.2-megapixel front facing camera, 4,270mAh battery, and Wi-Fi, Bluetooth support.

Specifications:

  • 7inch 1280×710 pixels resolution IPS display
  • Intel Atom Z2460 chipset with 1.6 GHz processor
  • 1GB RAM
  • PowerVR SGX540 GPU
  • 32GB internal memory
  • microSD card expandble option
  • WiFi/3G/Bluetooth support
  • 2G with voice calling
  • 4,270 mAh non-removable battery
  • Micro sim card slot

Asus FonePad
Image Source : Indiatimes

Comparison

Comparing with the recently launched Samsung Galaxy Tab 3 in India this might look like a deal with better specifications but the user base and believe in the brand shall make a difference. Let’s see what Asus can do.

[How-To] Change App Launcher On Android

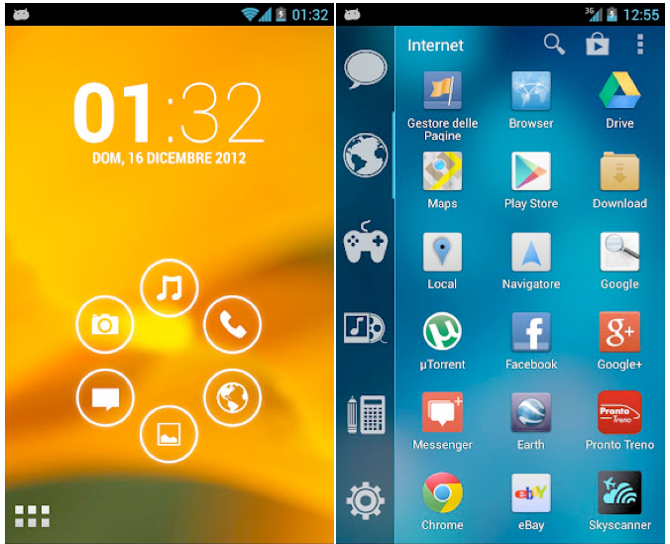
Android being an Open source project has its pros and cons with pros dominating the cons. Open source projects have this great advantage over that of proprietary that anyone who wishes can fork this project and can improve or develop different apps, tools and tweaks for the operating system. As a result Android operating system has number of applications that can change the functionality of the operating system in the desired manner. For example, if you are fond of stock UI and have Samsung, or a LG or any other device you can too get some of the UI layering on your handset or tablet with minimal tweaking.

Smart launcher
Image source : Android Beat

Nova launcher, Apex launcher, Holo launcher and many more are simple applications which can be found on Play Store which make some changes in the basic UI layering plus adding advanced features. These launchers change the way your home screen and app drawer behave and look along with some additional features like gestures, home screen lock, etc. Its very easy to get these tweaks on your device because they don’t require any hacks.
To install launcher on your launcher simply follow the steps below.

  1. Decide which launcher do you want on your Android device. Some of the options being Nova launcher, Apex launcher, Smart launcher, etc.
  2. Search for the launcher on the Google Play Store
  3. Install the application.
  4. Now your launcher has been installed. Press the Home key and Select that launcher as Default.
  5. Remove the previous launcher from RAM making it available for further use.

Nova laucher

In case you want your stock launcher back, go to Settings->Application Manager->All Applications->Launcher Name->Clear Defaults. Still left with any doubts?

[How-to] Change App Icons on Android Smartphones and Tablets

Android open source mobile operating system by Google is popular for its open standards and this uniqueness has made it most favored mobile operating system not by smartphone users but also for smartphone manufacturers. Android’s openness gives it the scope of modifications and customization so that when users get bored of looking at the same thing again and again they have the access to modify it without any pain.

Android-Menu-Icons
Image Source : Enfew

We humans always have this desire to get what we don’t have. Ever wished to have app icons which would look something funky or colorful or 3D or maybe flat? Developers and designers across the globe do have something for you.
Changing icons on Android is simple as installing an application. You literally have to do nothing in order to get your favorite icon pack. Follow the step-by-step guide below on how to change the icons and feel the refreshing look on your same old Android smartphone or tablet.

android_iconpack_by_gmadzl-d2skr11
Image source : Devianart gmadzl-d2skr11

App icons are available as packages which can be downloaded from the Play Store. So you don’t have to hunt around for them. But you have to make sure that you are using Nova launcher or Apex launcher because the stock launcher does not provide this option.

  1. Search for the icon pack you want. There are plenty of them available on the Play Store. Some of them are MNML White, Sense 5, MeeUI, Stark etc.
  2. After choosing the one, search for the icon pack on the Google Play Store and hit install.
  3. After installing the icon pack, select the installed package from the settings of the launcher.
  4. And its done. Simple isn’t it?

If you are still left with any queries feel free to contact us on our Twitter handle @idigestindia, our Facebook Page or you can leave a comment below.